Using the Snipping Tool

Like was mentioned earlier, the snipping tool is of four(4) types. Namely: The Free-form snip, Rectangular snip, window snip and the full screen snip.

Both
Windows Vista and Windows 7 come with a more robust screen capturing
tool, the Snipping Tool. With the Snipping Tool, you can define areas of
the screen you want to capture, edit, annotate the screen capture, and
share via email. Since you can save the image directly from the
program, the Snipping Tool also saves you the step of having to open
Paint or a different program and pasting the image from the clipboard and the stress of having to download My Screen shot.
The Snipping Tool (S.T) is a vital very tool.
The Snipping Tool (S.T) is a vital very tool.
How to use the Snipping Tool:
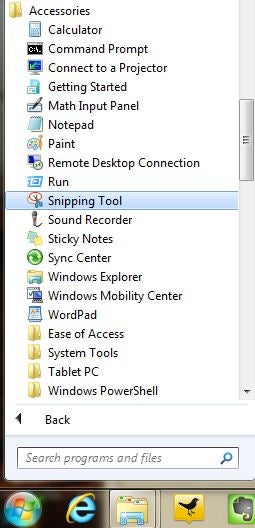
- Click on Start, then select All Programs, then open the folder named 'Accessories'. There is where you will find the Snipping Tool.
- Select it and pin it to your task bar for easy access.
- After opening the snipping tool, Click on the arrow pointing down to view and select your snipping type (Free-form Snip, Rectangular Snip,Window snip or Full Screen Snip. This arrow can be found next to the New button.
- Then use your mouse to select the area of your screen or window you want to capture.
Like was mentioned earlier, the snipping tool is of four(4) types. Namely: The Free-form snip, Rectangular snip, window snip and the full screen snip.
-
Free-form Snip. Draw a free-form shape around an object.
-
Rectangular Snip. Drag the cursor around an object to form a rectangle.
-
Window Snip. Select a window, such as a browser window or dialog box, that you want to capture.
-
Full-screen Snip. Capture the entire screen.
After you capture a snip, it's automatically copied
to the Clipboard and the mark-up window. From the mark-up window, you
can annotate, save, or share the snip.